Warehouse Layout Design: Best Practices for Distribution

📌 Key takeaways:
- Start your warehouse layout design with the outbound flow. Plan route staging first, then shape storage and pick paths around it.
- Place fast-moving SKUs close to outbound staging. Use pick frequency to guide slotting decisions.
- Review the layout regularly. Reslot products when demand changes or warehouse performance starts to slip.
A warehouse floor plan gets drawn once, and your team walks it thousands of times after that.
When a fast-moving SKU sits at the far end of the building, a picker covers that distance on every order until someone moves it.
In a lot of distribution warehouses, nobody chose those locations on purpose.
Product went wherever there was ample space the day it arrived, and over time the warehouse floor became a record of old deliveries.
For a distributor, the working day ends at the dock doors, when route trucks pull out with every order on board. That makes the truck the right place to start.
In this guide, we’ll cover warehouse layout design best practices for distribution operations, planned from the loading docks backward.
What does warehouse layout design mean for a distribution operation?
For a distributor, warehouse layout design is the plan that gets every route loaded correctly and out the door on time. It decides where each SKU lives relative to the trucks it ships on, and how the available space splits between storage and route staging.
That focus sets a distribution center apart from an ecommerce fulfillment site. Pickers pull full cases and pallets for retail accounts, and the whole outbound flow runs against fixed truck departure times. Many products also carry date codes, and route trucks bring returns back every afternoon.
Those pressures show up directly in operational costs. Every extra minute of picker travel adds labor, and a truck that leaves late delays every stop on its route.
Which warehouse layout type fits your distribution model?
Each warehouse layout type is named based on the path a product takes between receiving and shipping. The best warehouse layout is the one that fits your building and volume.
A U-shaped warehouse layout puts shipping and receiving on the same wall. It reduces product handling and lets dock crews switch between inbound and outbound work. It also supports cross-docking when inbound loads match outbound orders.
An I-shaped layout places receiving and shipping on opposite walls. Product moves in a straight line, which gives clear separation between inbound and outbound operations and suits high volume operations.
An L-shaped layout puts docks on adjacent walls, combining elements of both patterns. L-shaped warehouses keep inbound and outbound traffic apart without a second truck yard and leave generous storage capacity between the docks.
In a leased building, the existing dock doors usually decide the pattern for you.
The table below shows how each one handles route loading, so you know which weak spots to design around.
| Layout type | Dock setup | Best fit | Strength for route loading | Watch out for |
|---|---|---|---|---|
| U-shaped | Receiving and shipping on one wall | Small and mid-size DSD distributors with one truck yard | Shared doors let crews flex between inbound work and load-out | Inbound deliveries colliding with the morning load-out |
| I-shaped | Receiving and shipping on opposite walls | Regional distribution centers with steady, high volume | A full outbound wall with room for long staging lanes | Needs two truck yards, and every pallet crosses the full building |
| L-shaped | Receiving and shipping on adjacent walls | Irregular buildings and multi-temperature operations | Separate inbound and outbound flows from 1 yard | Wasted or congested floor where the two dock walls meet |
| Cross-dock | Inbound and outbound doors facing each other, little storage | Distributors moving presorted supplier loads straight onto routes | Fastest dock-to-truck time | Breaks down when inbound loads don’t match outbound demand |
What zones does a distribution warehouse need?
Every distribution warehouse shares the same core components, arranged in a logical flow from dock to dock. Function-specific storage areas keep inbound and outbound work from competing for floor space, which is where layouts tend to create bottlenecks.
Since the truck is the starting point, begin with the two zones where a distributor’s layout differs most from generic advice: route staging and returns.
Route staging and load-out
This zone decides whether trucks leave on time. Give each route its own staging lane beside the shipping area, marked on the floor and labeled with the route ID.
Stage each lane in reverse stop order. The last stop’s product loads first and rides at the nose of the truck, while the first stop’s order goes on last, right at the doors.
Plan sufficient space to stage every route at once during the load-out window. To size it, multiply your route count by the average pallets per route.
A distributor running 12 routes at 6 pallets each needs 72 floor positions, plus 1 spare position per lane for late adds, so about 84 in total.
Shape each lane like the truck it feeds, with pallets set out in the rows they’ll occupy on board. Keep a straight, clear path from each lane to its dock door, with no pick traffic or vehicle traffic crossing it.
Returns and unsaleables
Route trucks come back each afternoon carrying damaged cases, expired products, customer returns, and empties. Give returns a dedicated footprint beside receiving, well away from outbound shipping zones.
Split the zone into marked areas for resaleable stock, unsaleables awaiting credit, product headed for disposal, and empties. Without that split, returns end up parked in aisles and unsaleable cases drift back into pickable stock.
Size the zone from your heaviest return day, since returns spike after promotions and holidays.
The returns zone is where you confirm route accounting credits for each driver. Add a counting table and scanner access so your team can check returned quantities against what drivers logged.
Receiving and inspection
Size receiving for your busiest inbound day, since supplier trucks arrive on their schedule and not yours. Leave room at the dock to check date codes and case conditions, so short-dated products get caught before putaway.
A cramped receiving area pushes pallets into travel aisles, and every zone downstream slows down with it.
Reserve and forward pick storage
Reserve storage holds bulk storage pallets on pallet racks and feeds a forward pick area where pickers work. Selective racking gives direct access to every pallet, while denser storage systems suit SKUs with many pallets on hand. Shelving units suit split-case items, where pickers pull single units from an opened case.
Size the forward pick area to your fast movers only, since the full catalog would stretch every pick path. Vertical space under the sprinklers is often the cheapest storage capacity a building already pays for, and taller racking systems can maximize space without adding square footage.
💡 Pro tip:
Give promotional stock a temporary forward pick slot with an end date attached. When the promotion closes, move leftover cases back to reserve so a slow-selling promo pack stops tying up a prime slot.
Support and value-added space
Park pallet jacks and charge equipment off the main flow path.
Leave a build area for promotional displays and inventory kitting ahead of retail resets, when stores rearrange their shelves around a new planogram. Mark a separate, ventilated area for hazardous materials such as cleaning chemicals and aerosols.
How should you slot products in a distribution warehouse?
Slotting assigns each SKU to a specific location. Because it only moves products, it costs far less than changing the racking.
1. Slot by pick frequency
Use inventory data to rank SKUs by how often they get picked. A high-revenue SKU can still be a slow pick, so revenue is the wrong sort key.
Put the fastest movers in the forward pick area closest to outbound staging. Slow movers belong in upper levels and far aisles, with everything else in between.
💡 Pro tip:
New SKUs have no pick history, so any slot you give them is a guess. Park them in a small new-item zone at the edge of the forward pick area, then move them into their permanent slots once you have about two months of pick data.
2. Put heavy fast movers at waist height
For cases picked by hand from shelving or flow rack, the golden zone runs roughly from waist to shoulder height, where picking needs no bending or overhead reaching. Reserve it for fast movers that are also heavy, such as beverage and bulk grocery cases.
This placement targets the most common cause of serious workplace injuries. According to the Bureau of Labor Statistics, overexertion and repetitive motion led to more than 900,000 private-industry cases requiring days away from work or a change in duties across 2023 and 2024.
3. Build FEFO into the pick face
For date-coded products, the physical layout should force first-expired, first-out (FEFO) picking. Carton flow or pallet flow rack loaded from the back and picked from the front does this automatically.
Pickers take the closest case, so the closest case has to be the oldest one. A written procedure won’t hold up when a truck is waiting at the door.
4. Group products that ship on the same routes
Product-based layouts group inventory by characteristics or turnover. Distributors can add another filter: what ships together.
If convenience store orders almost always pair energy drinks with chips and jerky, slot those SKUs near each other so a picker builds the order in one pass. Apply the grouping inside your velocity zones, so fast movers keep their prime spots.
How wide should warehouse aisles be?
Aisle width sets the balance between storage density and safe movement.
Match aisle width to your equipment
Choose the equipment first and size the aisles around it. OSHA’s powered industrial truck eTool notes that conventional rack storage suits counterbalanced lift trucks, which need an aisle of about 12 feet. Reach trucks and order pickers work in much narrower aisles.
Narrower aisles add storage density but require more specialized equipment. Aisles too tight for the fleet lead to rack strikes and product damage.
Separate people from vehicles
OSHA requires sufficient safe clearance for aisles wherever mechanical handling equipment operates, with aisles kept clear and permanent aisles marked.
Physical separation between walkways and forklift lanes prevents collisions, especially during a busy load-out.
Keep exit routes clearly defined and free of staged pallets. Lighting and ventilation need to reach every aisle, including the high bays.
How do you design a warehouse layout step by step?
The warehouse planning process below works for a new building or a redesign of an existing one.
Step 1: Pull a year of order and route data
Gather pick frequency by SKU, orders per route, pallets per route, and return volumes by route. Include peak weeks such as summer beverage season and holiday promotions, since those set your capacity needs.
Pick frequency drives the slotting plan. Pallets per route and return volumes size the staging and returns zones.
Step 2: Measure the actual facility
Record column spacing, clear height under the sprinklers, dock door positions, and floor load ratings.
Column spacing fixes rack row lengths before anything else, so a warehouse floor plan drawn from memory tends to fail here.
Step 3: Work backward from the load-out
Place route staging first, using the sizing method above. Put fast movers beside it and reserve storage behind them, with returns next to receiving.
Warehouse design software lets you test these floor plans digitally before anyone moves a rack.
Step 4: Leave room to grow
Size each zone for its busiest realistic day, then add headroom. Modular racking and flexible layouts let you reconfigure as SKU counts and volumes change, with minimal disruption.
Step 5: Label every slot and test the flow
Give every slot a scannable location ID by aisle, bay, level, and position.
Walk the pick paths for your most common orders with the people who pick them, and watch traffic patterns before you commit. Use the trial run to train employees on the new locations.
After go-live, a warehouse management system keeps each location accurate and directs pickers, which holds a carefully planned layout together.
How do you know if your warehouse layout is working?
A smart layout should boost productivity in ways you can measure. Track these numbers before and after any change, and use them to find what to fix:
- Pick lines per labor hour. A drop usually means fast movers have drifted out of prime slots, so reslot first
- Dock-to-stock time, from truck arrival to product ready to pick. When it climbs, check receiving for congestion and putaway paths for long detours
- On-time route departure. Late trucks usually point to staging, either lanes too short for the load or lanes crossed by pick traffic
- Load accuracy, measured as mis-loads and short-ships per route. Errors here often trace to unlabeled staging lanes or look-alike SKUs slotted side by side
Workflow efficiency erodes gradually as SKUs and volumes shift, so audit the layout and reslot every quarter and before seasonal peaks. Each audit also shows where wasted space is building up.
Plan your layout around live data
An efficient warehouse layout depends on knowing which SKUs move fastest and which routes carry them.
Inventory management software connects stock levels with live orders and route schedules. Slotting and staging decisions then come from current activity and not last year’s spreadsheet.
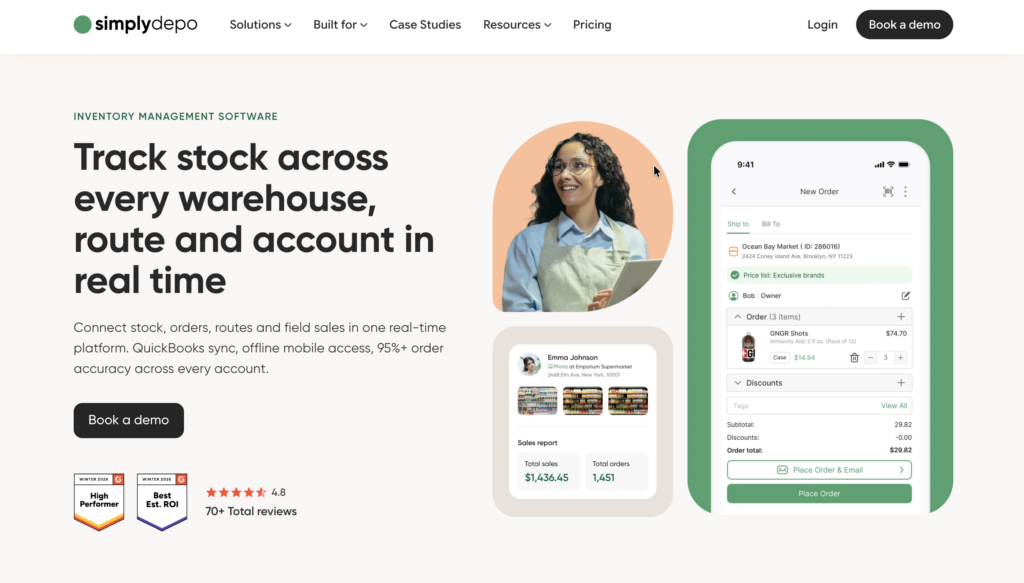
A platform like SimplyDepo gives distributors real-time stock visibility across warehouses and routes, with automated reorder triggers and order validation built into its stock and order coordination.
Its route and delivery tools tie stock data to route schedules and delivery windows, so route managers can allocate product to the right accounts before trucks load.
Warehouse and field teams can update stock counts and orders offline, with automatic sync on reconnect. QuickBooks and Shopify integrations keep warehouse data aligned with accounting, which helps your layout decisions and your supply chain run on the same numbers.
Ready to make warehouse operations easier to manage? Book a demo and see how live inventory and route data come together in one place with SimplyDepo.
FAQs on warehouse layout design
Start from inventory and work out to square footage. Estimate how much inventory you hold at peak in pallet positions, then add space for receiving, staging, returns, and aisles, plus growth headroom.
For CPG distributors, peak usually means summer or holiday promotions. An estimate built on average weeks will come up short when volume spikes.
Place them in the storage rows closest to the shared dock wall, on the outbound side, so pick paths to staging stay short. Keep them out of the main cross aisle in front of the docks, where inbound pallets and load-out traffic already overlap. Slow movers belong at the back of the building, at the far end of the U.
Yes. A small warehouse still benefits from one-way flow and velocity-based slotting, even with a single dock wall.
Small operations often gain the most from vertical storage and shelving units for split-case picking, since horizontal space runs out first.
Phase the change zone by zone, starting with the area that causes the most delays. Move product during off-peak shifts, and update location IDs in your system before each move. Leave route staging untouched until last, which protects outbound service while the rest of the building changes around it.
Give chilled and frozen products their own zones, with dedicated doors close to outbound staging so the product spends little time at ambient temperature. Keep cooler doors out of main forklift paths to limit door openings. An L-shaped layout helps here, since one leg of the building can hold the temperature-controlled zones.
Divide the space occupied by stored inventory by your total usable storage capacity. Measure in cubic terms, since a floor-only calculation hides unused vertical space. Check the number during peak weeks too, because a warehouse that looks comfortable on average can run out of room in the middle of a promotion.
-
 October 1, 2026
-
 October 1, 2026
-
 October 1, 2026